Last week, I described how to add a dynamic watermark to your images on the JVM. I didn't find any library, so I had to develop the feature, or, more precisely, an embryo of a feature, by myself. Depending on your tech stack, you must search for an existing library or roll up your sleeves. For example, Rust offers such an out-of-the-box library. Worse, this approach might be impossible to implement if you don't have access to the source image.
Another alternative is to use ready-made components, namely imgproxy and Apache APISIX. I already combined them to resize images on-the-fly.
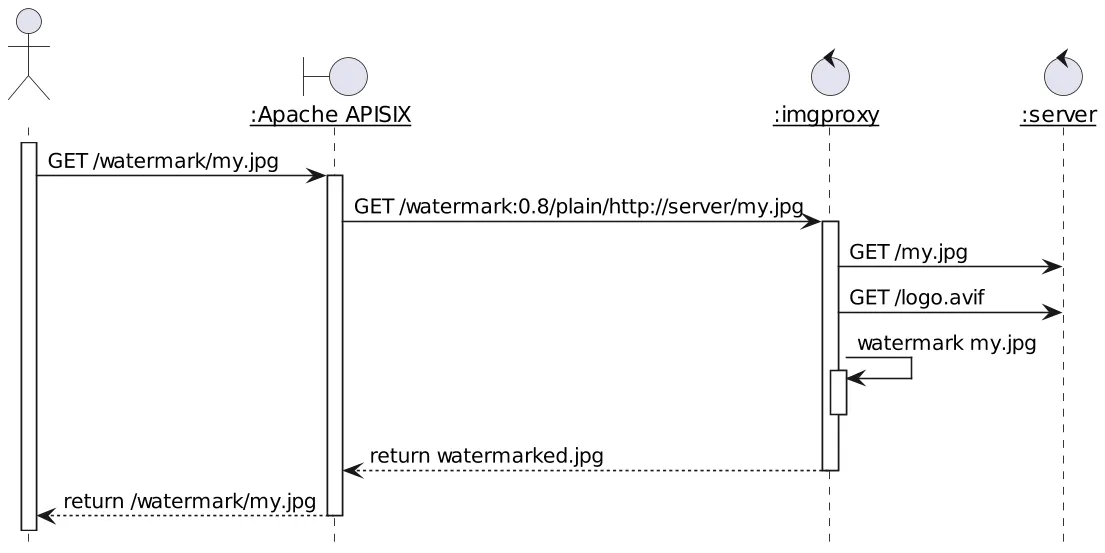
Here's the general sequence flow of the process:

- When APISIX receives a specific pattern, it calls
imgproxywith the relevant parameters imgproxyfetches the original image and the watermark to apply- It watermarks the original image and returns the result to APISIX
Let's say the pattern is /watermark/*.
We can define two routes:
routes:
  - uri: "*"                                                                     #1
    upstream:
      nodes:
        "server:3000": 1
  - uri: /watermark/*                                                            #2
    plugins:
      proxy-rewrite:                                                             #3
        regex_uri:
          - /watermark/(.*)
          - /dummy_sig/watermark:0.8:nowe:20:20:0.2/plain/http://server:3000/$1  #4
    upstream:
      nodes:
        "imgproxy:8080": 1                                                       #5
- Catch-all route that forwards to the web server
- Watermark images route
- Rewrite the URL...
- ...with an
imgproxy-configured route and... - ...forward to
imageproxy
You can find the exact rewritten URL syntax in imgproxy documentation. The watermark itself is configured via a single environment variable. You should buy imgproxy's Pro version if you need different watermarks. As a poor man's alternative, you could also set up different instances, each with its watermark, and configure APISIX to route the request to the desired instance.
In this post, we implemented a watermarking feature with the help of imgproxy. The more I think about it, the more I think they make a match made in Heaven.
The complete source code for this post can be found on GitHub.
To go further:
